
Codex — OpenAI’s coding agent
Install Codex, run your first task in a project folder, then level up in four tabs. Start by checking what you need and copying your install command.
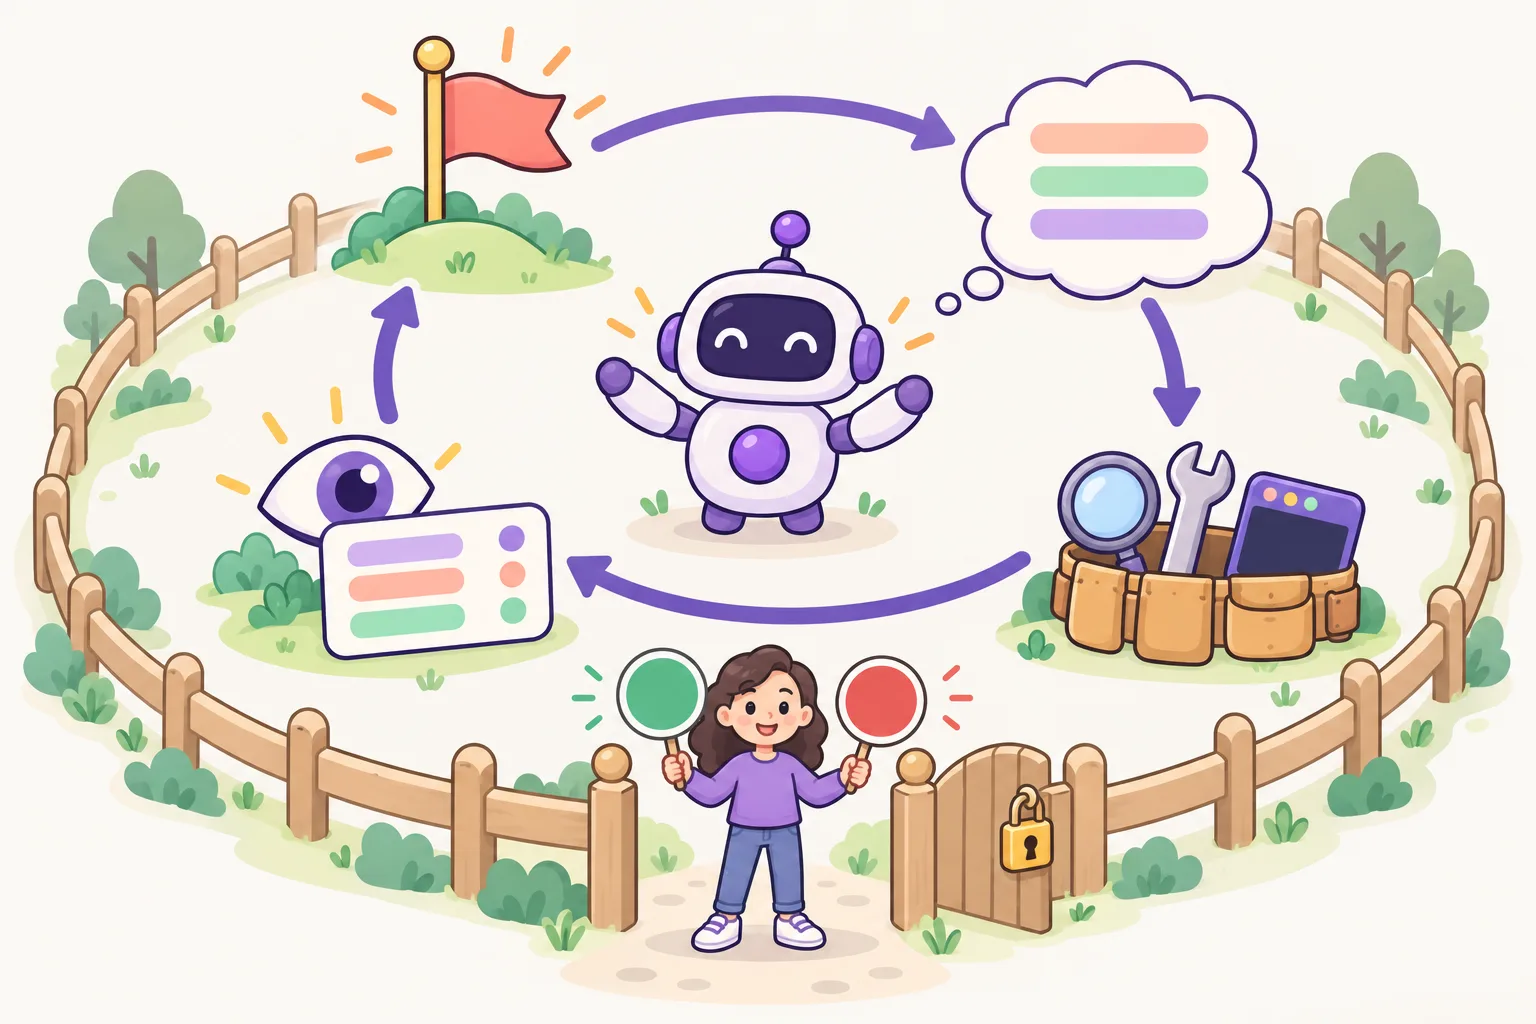
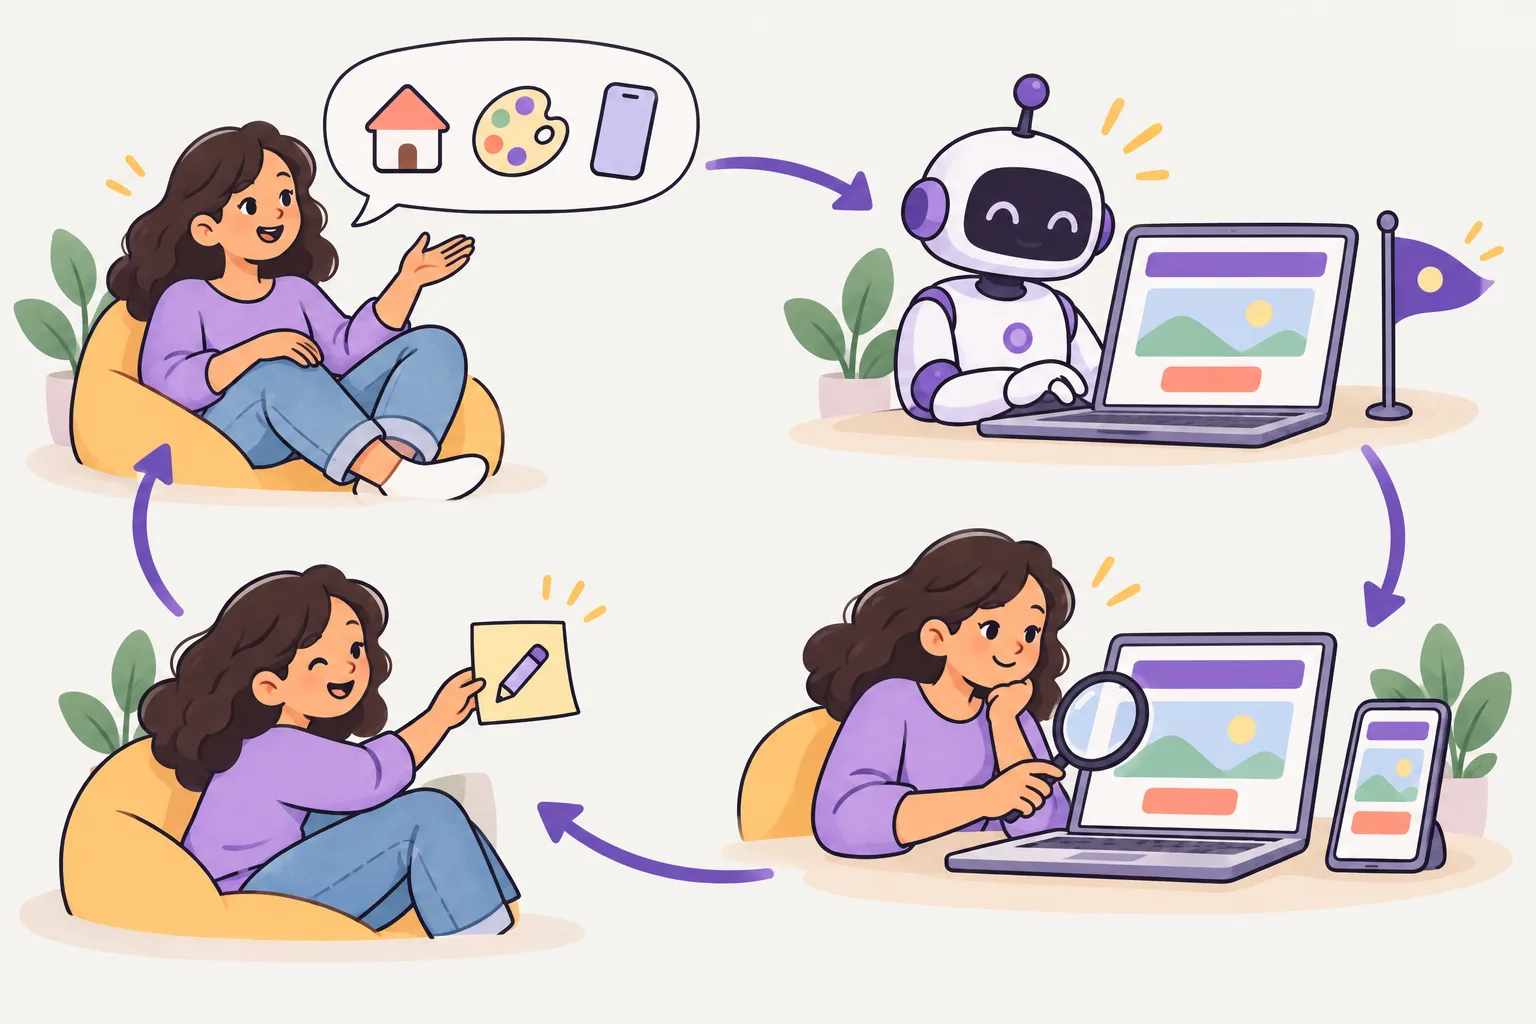
Basics — install it and do your first task
New to it? Start here. Learn what Codex is, install it and follow the first five steps. When you have done them all, move on to the [Intermediate] tab above.
What it is
is ’s . It works in the (Codex CLI), as a and in the app. With you can also hand work to a environment and apply the result on your own computer.
Rules for your project go in , an open format that many coding agents read. You choose what Codex may do with /.
What you need
- An account: Codex is in every ChatGPT plan (Free, Go, Plus, Pro, Business, Edu, Enterprise), but where you can use it differs. On Free and Go it is only in the desktop app (still rolling out); the on this page needs Plus or higher. You can also sign in to the CLI with an — paid at prices, with no cloud features.
- A computer: or () or ( install script). and work too.
- A project folder to work in — as a you can read what Codex changed with / and undo it with .
Install
On macOS and Linux run the first line; on Windows run the PowerShell line. If you installed with the , run the same again to update.
- macOS · Linux
curl -fsSL https://chatgpt.com/codex/install.sh | sh- Windows PowerShell
powershell -ExecutionPolicy ByPass -c "irm https://chatgpt.com/codex/install.ps1 | iex"- npm
npm install -g @openai/codex- Homebrew
brew install --cask codex
Check the installation
Open a new terminal window. codex --version should print a number. If you see “”, open the terminal again and check your .
codex --version
First run — five steps
- Open a terminal, move into your project folder with <folder>, then type codex, press Enter and choose “Sign in with ChatGPT”.
- Ask “Tell me about this project” so it reads the project.
- Run to create AGENTS.md, then write your test command and the rules to follow.
- Use /permissions to choose what Codex may do without asking.
- Give a task that names the file, the behaviour and how to check it. Read the diff, run the tests yourself, then .
cd my-project
codex
Features you will use often
- AGENTS.md — project instructions read in every session (start with /init)
- /permissions — how far it may edit files and run commands
- "…" — run without the chat screen, for scripts and
- codex cloud — hand work to a cloud environment and apply the result locally
- The code editor extension and the ChatGPT desktop app — the same Codex in other places. In the app, choose Codex and start with New chat. In VS Code, choose the Codex icon, or run Codex: Open Codex Sidebar from the Command Palette.
- skills — teach repeated work with folders in .agents/skills/
Use it safely
- If it changes more than you asked, stop it. Undo a file with git restore <file> (or pick parts with git restore -p <file>). This discards every unstaged change in that file — your own edits too — but keeps staged changes and new untracked files (GIT step 4). Then ask again, naming the exact files.
- Read the diff even when the tests pass, and commit only what you understand.
- For a big task, ask for a plan first and hand it over in small pieces. Say what may change, what must stay as it is, and what will prove the job is done, such as a passing test.
Basic practice — try it once from the start
If you get stuck: if codex does not start, check the install with codex --version; if sign-in fails, run codex login. Done all five? Move on to the [Intermediate] tab.
Learn more on BaeumNova
- Codex: OpenAI's coding agent
- Agents and sub-agents: how an AI works step by step
- Goal and Ralph Loop: let an agent keep going until it is really done
- Agent skills — Codex uses the same SKILL.md folders
- Writing AGENTS.md well
- Approvals and the sandbox — how much to hand over
- codex exec — automate without the chat screen
- Codex cloud — hand work to the cloud
- Which form should you install?
- Check your current usage and when it resets
Official documentation
Checked against the official documentation on 2026-11-02. These tools change often — if a command fails, see the official docs.

Intermediate — AGENTS.md, approvals, sandbox, commands
You have installed it and done a first task — now build the habits you will use every day. Write AGENTS.md well, share the same instructions with other AIs such as Claude Code, decide how much to hand over with approvals and the sandbox, and learn the chat commands and how to ask well.
Models and reasoning effort — which to use (recommended: GPT-6.1 Sol, High)
As of November 2026, use GPT-6.1 Sol at High effort for development — set it as below or pick it with /. Every model and , and when to go lower or higher, is in Recommended use on Tool Master.
model = "gpt-6.1-sol"
model_reasoning_effort = "high"
codex -m gpt-6.1-sol
codex -m gpt-6.1-sol -c model_reasoning_effort=high
codex exec -m gpt-6.1-sol "Review the current changes"

# inside Codex
/model    # model → effort (Max · Ultra: More reasoning…)
Writing AGENTS.md well
reads when it starts work. It first reads your file (~/.codex/AGENTS.md), then walks from the top of the project (usually the top of the ) down to the , finds one file per folder and joins them in order. Files closer to the current folder come later, so they win.
- ~/.codex/AGENTS.md — your personal instructions for every project
- AGENTS.md at the top of the project — instructions the team shares ( it)
- AGENTS.md in a — instructions added only when working in that folder
- — if it is in the same folder, it is read instead of AGENTS.md (for trying a change for a while).
- Only up to 32 in total is read by default (project_doc_max_bytes). To use files with other names, list them in project_doc_fallback_filenames.
# AGENTS.md

## Setup
- Install: pnpm install
- Test: pnpm test
- Lint: pnpm lint

## Code style
- TypeScript strict mode, single quotes.
- Keep functions small. Add a test for every bug fix.

## Don't
- Don't edit generated files in dist/.
- Don't commit .env files.
~/.codex/AGENTS.md          ← you, every project (read first)
my-project/AGENTS.md        ← team rules (commit it)
my-project/web/AGENTS.md    ← only for web/ (read last, so it wins)
reads the project and writes a first AGENTS.md. AGENTS.md is read once per run, so restart Codex after editing it.
Approvals and the sandbox — how much to hand over
Codex keeps things safe in two ways. The sandbox sets what it can technically do (writing files, ), and the sets when it asks you. Choose both together.
- — it only reads and changes nothing. Use it to look around a project you do not know.
- — it edits and runs only inside the working folder. In a Git repository Codex recommends "Auto", which pairs this with on-request, but it may start in read-only until you trust the folder. The network is off by default, and .git, .agents, .codex and .aws stay read-only.
- — no sandbox, it can do anything. Use it only in an .
- Approval policy (-a): on-request asks when it needs to go outside the sandbox, never does not ask (it works only inside the sandbox). --approve-for-me sends eligible approval requests to automatic review without widening file or network .
- /permissions switches modes during a conversation, and /status shows the current settings.
codex --sandbox read-only                      # look only, change nothing
codex --sandbox workspace-write                # edit inside this folder ("Auto" in a Git repo)
codex -a never --sandbox workspace-write       # never ask, but stay inside the sandbox
approval_policy = "on-request"
sandbox_mode = "workspace-write"

[sandbox_workspace_write]
network_access = false
The --full-auto in older articles no longer exists. Use --sandbox workspace-write for the same thing. = "untrusted" is also retired and can stop Codex from starting, so remove it; for read-only work use sandbox_mode = "read-only" with approval_policy = "on-request". --yolo (--dangerously-bypass-approvals-and-sandbox) turns off both the sandbox and approvals, so use it only somewhere isolated.
Slash commands and prompt shortcuts
Type / in the Codex chat screen and the list of commands appears. Learn the ones you use every day first.
- /model — choose the model and how hard it thinks (reasoning effort).
- /diff — see the Git changes in the working folder, new files included. /review — have it review the changed .
- /compact — summarize the conversation to free up room. /new — start a new conversation.
- — pick an earlier conversation to continue. In the terminal, codex resume or codex resume --last.
- /status — see the current settings such as model, permissions and working folder. /mcp — see the connected .
- @ — find a file and attach it to the request. $ — call a . ! — run a command right away (!git status).
- When you start Codex from the terminal: -i picture.png starts with a attached (during a conversation, paste it), and --search turns on live web search.
- /init — create AGENTS.md. /plan — have it make a plan first.
- <> — keeps working until it is met. /goal alone shows it; /goal pause, resume and clear pause, continue and remove it (Codex 0.128.0 and later).
Coming from Claude Code? /import brings in Claude Code's setup and recent conversations.
Save context — set Codex to auto compact at 475k (BaeumNova setting)
Handing over work well — where, what and how to check
- Vague request: "Fix the cart"
- Clear request: "In @src/cart.ts the total becomes when a quantity is 0. Make it remove that item when the quantity is 0, add a test to tests/cart.test.ts and check that test passes."
- Start a big job with "Show me only a plan first", adjust the plan, then let it go on.
- If it changes more than you asked, stop it, undo only that file with <file> (your own unstaged edits in it are lost too) and ask again, naming the files.
- Paste the whole error output — the original is more accurate than a summary.
- When it is done, read the changes with /diff, run the tests yourself, then commit.
Check yourself — three quick questions
Look at this small project. Answer each question in your head first, then open the answer.
my-shop/
├── AGENTS.md
│   Test with npm test.
│   Never edit .env files.
└── services/api/
    ├── AGENTS.md
    │   Test with go test ./...
    └── orders.go
-
You are working in services/api, and the two AGENTS.md files give different test commands. Which command does Codex use, and does the rule still apply?
Show the answer
It uses go test ./... — Codex joins the files from the root down, so the nearest file comes last and wins when two rules disagree. The .env rule conflicts with nothing, so it still applies.
-
You want Codex to fix a in this folder. It must ask before it goes outside the folder or uses the network. Which settings do you start with, and why is a line in AGENTS.md not enough?
Show the answer
Use --sandbox workspace-write with the approval policy on-request (the Auto setting). The sandbox really limits what Codex can reach, and on-request makes it ask before going beyond that. A line in AGENTS.md is only an instruction — nothing enforces it.
-
You checked orders.go and ran git add. Then Codex changed orders.go again and created new.go. You want to drop only the new change to orders.go. What do you run, and what happens to new.go?
Show the answer
Run git restore orders.go. It throws away only the unstaged change, so orders.go goes back to the you staged; any edit you made by hand after git add is lost too. new.go is untracked, so it stays until you delete it yourself.
Best practices — how OpenAI recommends using Codex
In short: ask with four parts (goal, , limits, done when), plan hard work first, let Codex check its own work, keep rules in AGENTS.md and use one chat per piece of work. The six good habits, with commands for both tools, are in Recommended use.
Common mistakes — and how to avoid them
The official guide lists eight mistakes — for example rules stuffed into the , no build or test commands, a skipped plan and full access too early. All ten mistakes from both guides, each with its fix, are in Recommended use.
Intermediate practice — try it in your own project
- Create AGENTS.md with /init and refine the test command and three rules. Check that it is read:
codex --ask-for-approval never "Summarize the current instructions."should repeat your rules. If they are missing, start Codex inside the project, make sure the file is not empty, and look for an AGENTS.override.md that replaces it. - If you also use Claude Code, check that the project has no CLAUDE.md, so both AIs read the same AGENTS.md.
- Have it look around the project with codex --sandbox read-only, then hand over a small fix with workspace-write.
- Review the changes with /diff and /review.
- See the current settings with /status and continue the conversation with codex resume --last.
Done all five? Move on to the [Advanced] tab.
Official documentation
- Codex — AGENTS.md
- Codex — Approvals & security
- Codex — Config reference
- AGENTS.md
- Codex — Models
- Codex — Best practices
- Codex — Common mistakes
Checked against the official documentation on 2026-11-02. These tools change often — if a command fails, see the official docs.
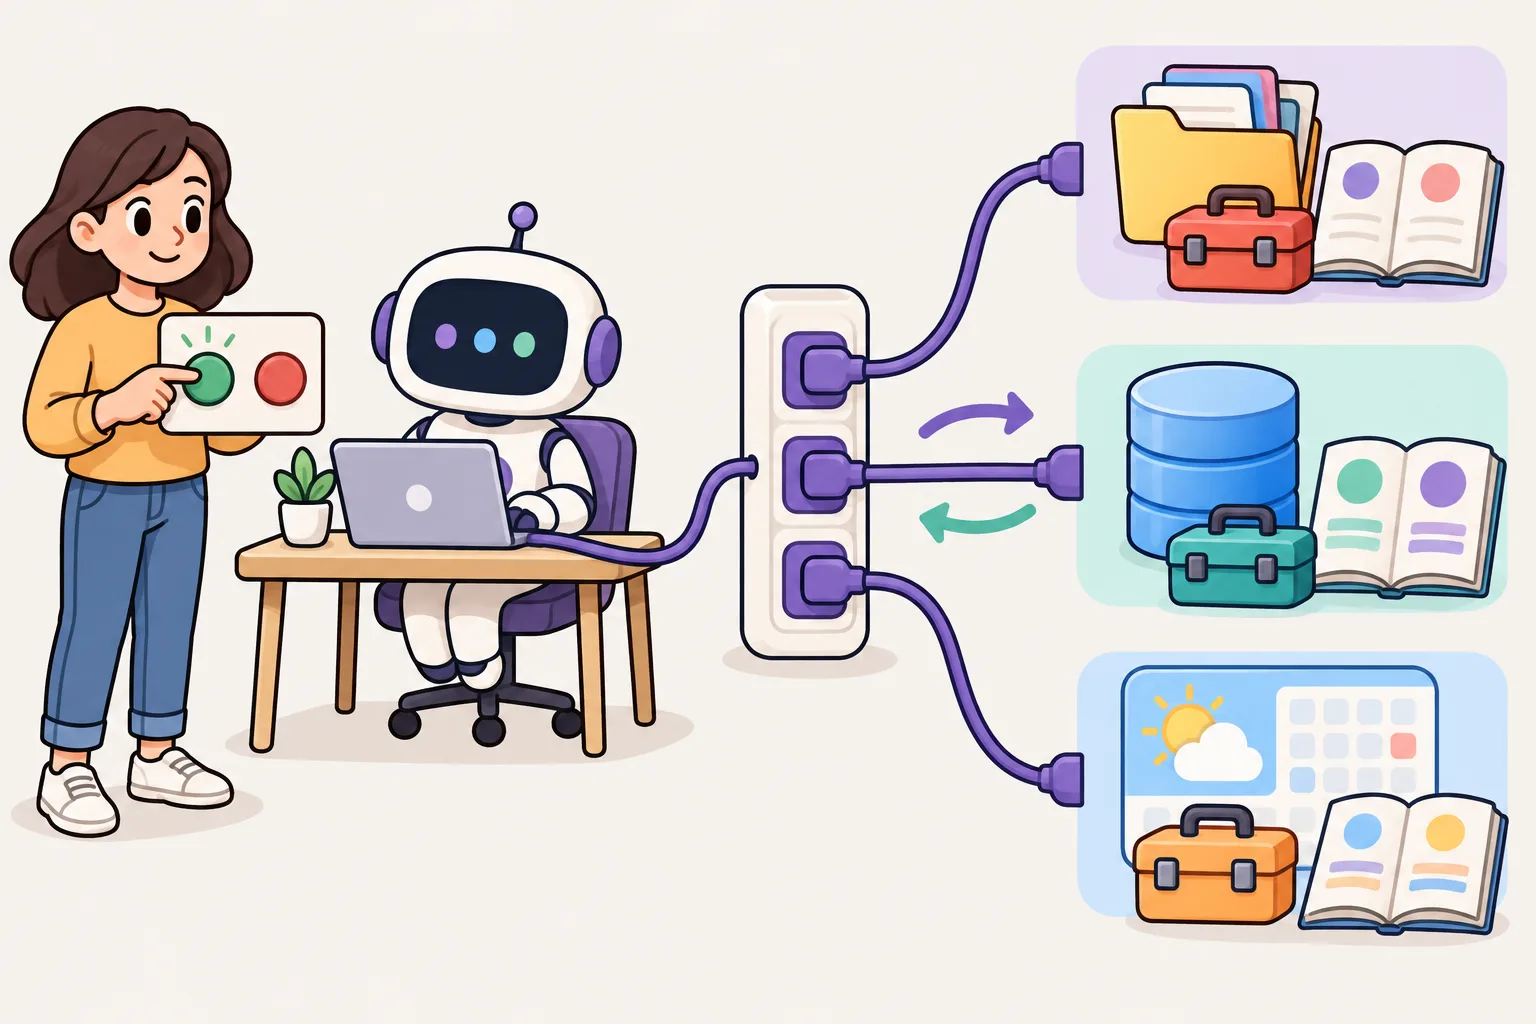
Advanced — config.toml, codex exec, MCP, skills, hooks
Fit Codex to your way of working with the config file and profiles, put it into scripts with codex exec, connect outside tools with MCP, teach repeated jobs with skills and enforce must-follow rules with hooks.
config.toml and profiles — fit it to your way of working
settings live in ~/.codex/. Options you used to add every time become defaults once written here. Settings that differ by job go into files.
- · model_reasoning_effort — the model to use and how hard it thinks
- · sandbox_mode — the and sandbox (the values from Intermediate)
- A profile is a file ~/.codex/<name>.config.toml. Choose it with codex -p <name> and its values sit on top of the base settings (the old [profiles.x] tables are no longer read). Do not confuse it with a profile: that is a Beta way to set file and permissions, and it cannot be mixed with sandbox_mode.
- -c key=value changes a setting for this run only (for example -c sandbox_workspace_write.network_access=true).
- When the same setting appears in several places, the strongest wins. From strongest: command-line flags and --config, the project .codex/config.toml (the nearest folder first, trusted projects only), the --profile file, ~/.codex/config.toml, cloud-managed defaults, /etc/codex/config.toml, then the built-in defaults.
- web_search chooses how Codex searches: cached, indexed, live (the same as --search) or disabled.
- shell_environment_policy sets which reach the Codex runs (inherit = "none" or "core" passes fewer). [features] turns optional features on and off. CODEX_HOME moves the settings folder away from ~/.codex, and that folder must already exist.
- On , mxc is the recommended sandbox on compatible devices; elevated and unelevated are legacy fallbacks. For the standalone , set prefer_mxc = true under [features].
model_reasoning_effort = "high"
approval_policy = "on-request"
sandbox_mode = "workspace-write"
web_search = "cached"
# a profile: codex -p review
model_reasoning_effort = "xhigh"
sandbox_mode = "read-only"
codex -p review
codex -c sandbox_workspace_write.network_access=true
A .codex/config.toml in a project holds settings for that project only — it is in projects you have marked as trusted.
codex exec — automate without the chat screen
"…" does the job once without the chat screen and exits. Progress goes to and the final answer to stdout, so it fits well into , and .
- It is read-only by default. Add --sandbox workspace-write to let it edit files.
- --json sends progress as (JSONL), -o <file> saves the final answer to a file, and --output-schema <file> gets an answer that matches a .
- Run it with no and standard input becomes the prompt; pipe input in together with a prompt and the input is appended.
- Outside a you need --skip-git-repo-check. codex exec resume --last continues the previous run.
- schema.json fixes the shape of the final answer. With --output-schema schema.json the answer comes back as with summary and files. If "additionalProperties": false is missing, the run stops with 1 and an "Invalid " error, so add it and run again.
# Ask once, print the answer (read-only by default)
codex exec "Summarize what changed in the last 5 commits"

# Allow edits inside this folder
codex exec --sandbox workspace-write "Fix the failing test in tests/cart.test.ts"

# Pipe input in
cat error.log | codex exec "Find the cause"

# For scripts: JSON events, the final answer in a file, a JSON Schema answer
codex exec --json "List the TODOs in src/" > events.jsonl
codex exec -o notes.md "Write release notes for this week"
codex exec --output-schema schema.json "Rate the test coverage of each file"

# Continue the last run
codex exec resume --last "Now add tests for it"
{
  "type": "object",
  "properties": {
    "summary": { "type": "string" },
    "files": { "type": "array", "items": { "type": "string" } }
  },
  "required": ["summary", "files"],
  "additionalProperties": false
}
In CI, pass CODEX_API_KEY only to the step that runs Codex, so scripts in other steps cannot see the key.
MCP — connect outside tools
(Model Context Protocol) is an that lets tools use outside services (issue trackers, , , document tools). Add an to Codex and it can use that 's tools — the same servers uses work as they are.
- codex mcp add <name> -- <command> — add a server that runs on your computer (stdio).
- codex mcp add <name> --url <> — add a remote server ().
- Added servers are saved in [mcp_servers.<name>] tables in config.toml. During a conversation, /mcp shows their status.
# A server that runs on your computer (stdio)
codex mcp add playwright -- npx @playwright/mcp@latest

# A remote server (streamable HTTP)
codex mcp add notion --url https://mcp.notion.com/mcp

codex mcp list
[mcp_servers.playwright]
command = "npx"
args = ["@playwright/mcp@latest"]
tool_timeout_sec = 60
Agent skills — teach it jobs you repeat
A is a folder with a in it — the same open format as Claude Code. Normally Codex knows only each skill's name and description; when a job matches the description, it reads the body and follows it. The old custom prompts (~/.codex/prompts) should now be turned into skills.
- .agents/skills/<name>/SKILL.md is for this repository, ~/.agents/skills/ for all your projects.
- Call one directly with $<skill name> or pick from the list with /skills. It also uses one on its own when the description fits.
- Write name and description, and keep scripts and reference documents in scripts/ and references/.
- Ask the built-in and it helps you make a new skill.
---
name: release-notes
description: Write release notes from the git log. Use when the user asks for release notes or a changelog.
---

1. Find the last tag: `git describe --tags --abbrev=0`
2. Read the commits since then: `git log <tag>..HEAD --oneline`
3. Group them under Added / Fixed / Changed, in plain sentences.
Hooks — commands that always run at set moments
A is a command Codex runs at a set moment. A request in can be forgotten, but a hook runs whenever that moment comes. Use hooks to run a , block dangerous commands and get a notification when work is done. Treat them as a useful guardrail, not a complete enforcement boundary: hosted tools such as web search do not go through hooks, and some other tool can skip them.
- Put them in ~/.codex/hooks.json (you) or .codex/hooks.json in the repository (project), or write inline [hooks] tables in config.toml. Use one form in each place.
- Attach them to moments such as and (before and after a tool), (when you send a request), Stop (when it finishes its answer) and SessionStart (when a session starts).
- chooses the tools. What exit code 2 does depends on the moment: on PreToolUse it stops the tool before it runs; on PostToolUse the tool has already run, so the reason in stderr only goes to Codex as feedback and the change stays.
- If you only need notifications, put a in notify in config.toml — it runs with a JSON argument each time a turn ends.
- Codex edits files with apply_patch (matched as Write or Edit) but can also write them with a command, so a formatter hook needs in matcher too. The hook receives its input as JSON on stdin.
{
  "hooks": {
    "PostToolUse": [
      {
        "matcher": "Bash|Write|Edit",
        "hooks": [
          {
            "type": "command",
            "command": "sh .codex/hooks/format.sh",
            "statusMessage": "Formatting changed files"
          }
        ]
      }
    ]
  }
}
#!/bin/sh
# Codex sends the hook input as JSON on stdin; this formatter does not need it.
cat > /dev/null
git status --porcelain --untracked-files=all | cut -c4- \
  | grep -E '\.(js|ts|css|html|json|md)$' | grep -v '^\.codex/' \
  | xargs -r npx --yes prettier --write >&2
A new hook runs only after you mark it as trusted in /hooks. Trust a hook from someone else only after you have read and understood its command.
How the pieces fit together
Codex gives you several places to keep rules and repeated work. Each does a different job, so put each thing in the place made for it.
- AGENTS.md — lasting instructions that shape how Codex works in this project.
- Memories — useful from earlier work that Codex carries forward.
- Skills — a repeatable process, packed so Codex can follow it when that job comes up.
- Plugins — the installable form. Write a skill first, then package it as a plugin when you want to share it.
- Hooks and MCP — hooks run your commands at set moments, and MCP connects Codex to systems outside the workspace.
- — helpers that take delegated work, such as a review, so the main conversation stays focused.
- Together, for example: AGENTS.md says to run test before finishing, a recalls which file you were fixing, a skill writes the , MCP reads the issue from your tracker, and a reviewer subagent checks the .
Keep required rules in AGENTS.md or checked-in documents. A memory is a helpful recall layer, not the only source for a rule that must be followed.
Advanced practice
- Write your default approval and sandbox in ~/.codex/config.toml, make a read-only review profile (review.config.toml) and use it with codex -p review. Check it:
codex exec -p review "Reply ok"should printsandbox: read-onlyat the top. A misspelled profile name or file name gives no error — Codex quietly uses your base settings — so check this line before you trust the review to change nothing. - Write a script that summarizes this week's into a file with codex exec -o.
- Add one MCP server and check it with /mcp.
codex mcp listshows only what is configured, not whether the server started. If its tools are missing in /mcp, run the server command on its own in a terminal to see the error ( needs ). - Turn one job you do often into a skill in .agents/skills/ and call it with $name. It should appear in /skills. If it does not, check the folder and the name in SKILL.md, then restart Codex.
- Copy the two files from the Hooks section (npx needs Node.js), mark the hook as trusted in /hooks, then ask Codex to create demo.js with messy spacing. The file should come out formatted. If the formatter fails, the hook shows as failed and Codex keeps working, so read the hook status instead of assuming it ran.
Done all five? Move on to the [Master] tab.
Official documentation
- Codex — Config reference
- Codex — Non-interactive mode
- Codex — MCP
- Codex — Skills
- Codex — Hooks
- Codex — Customization
- Codex — Plugins
Checked against the official documentation on 2026-11-02. These tools change often — if a command fails, see the official docs.

Master — subagents, cloud, GitHub, several AIs together
Hand work to subagents and the cloud, get reviews from @codex on GitHub, review each other's work with other AIs such as Claude Code, and have the team work from the same setup.
Subagents — hand off parts of the work
Ask to start and it splits research, building and review to run at the same time. Each has its own conversation, so the main conversation stays clean.
- Built-in default, worker and explorer are there from the start, and /subagents moves between subagents.
- Make your own subagents as files in .codex/agents/ (project) or ~/.codex/agents/ (you) — name, description, developer_instructions.
- Subagents inherit the parent's sandbox and approval settings. "Never edit files" in an file is only an instruction, so for a real limit start the parent with --sandbox read-only.
- Split the roles in your request, like "Review the current with reviewer, and meanwhile have worker write tests".
name = "reviewer"
description = "Reviews diffs for bugs and missing tests."
developer_instructions = """
Run git diff. List bugs with file and line, then missing tests.
Never edit files.
"""
model_reasoning_effort = "high"
Codex cloud — hand work to the cloud
runs work in 's environment. It does not use your computer, so you can hand over several jobs at once and apply only the finished results you choose to your files.
- First create an environment: in on the web or in the desktop app, choose Work in > Cloud > Select environment > Create environment. Pick your , let Codex prepare and test the setup, then review and publish it.
- codex cloud shows the task list and starts new tasks. You can also hand one over directly with codex cloud exec --env <environment > "…".
- codex apply <task ID> applies the change made in the cloud to your repository ().
- Have it try the same job several times (--attempts) and pick the best result.
codex cloud                                   # see and start cloud tasks
codex cloud exec --env <ENV_ID> "Add input checks to the signup form"
codex cloud list
codex apply <TASK_ID>                         # apply the result to your files
GitHub — @codex review in PRs
Connect a GitHub repository to Codex and just writing @codex review in a comment gets you a review. With the (openai/codex-action) it can also run automatically on every PR.
- @codex review — reviews that PR and reports only serious problems (, P1). You can turn on automatic review of every PR in the Codex settings.
- Any other @codex … comment starts a cloud task with that content.
- openai/codex-action@v1 takes and sandbox, runs Codex and gives the final answer as final-message — post it as a comment in a next step.
- Pass the key as a (OPENAI_API_KEY), and keep sandbox at for a review that only reads.
name: Codex review
on:
  pull_request:
jobs:
  review:
    runs-on: ubuntu-latest
    permissions:
      contents: read
    steps:
      - uses: actions/checkout@v4
      - uses: openai/codex-action@v1
        id: codex
        with:
          openai-api-key: ${{ secrets.OPENAI_API_KEY }}
          prompt: "Review this pull request. List bugs and missing tests."
          sandbox: read-only
      # the answer is in steps.codex.outputs.final-message
Put a ## Rules section in and Codex's PR reviews follow those rules.
Using several AIs together — review each other
When another reviews one AI wrote, problems that one would miss alone show up. If you share the same instructions through AGENTS.md, it is easy to switch between Codex and in one project.
Splitting the roles is another way. One AI plans and builds, another reviews and tests, and a person reads the final diff and decides whether to merge.
- codex review --uncommitted — Codex reviews the uncommitted changes. --base <> reviews a whole branch.
- diff | claude -p "…" — Claude Code reviews the changes Codex made.
- From inside another AI's session, can hand one job to Codex (for example writing tests or making a picture).
- When the two AIs disagree, have both give evidence (file, line, test result) and let a person check and choose.
# Claude Code wrote the change — Codex reviews it
codex review --uncommitted

# Codex wrote the change — Claude Code reviews it
git diff | claude -p "Review this diff. List bugs and missing tests."

# From inside another AI's session, hand one job to Codex
codex exec --sandbox workspace-write "Write unit tests for src/price.ts"
Codex SDK and App Server — build on Codex
When a terminal is not enough, call Codex from your own . The runs Codex from code, and App is for building a deep Codex integration into your own product.
- : install @openai/codex-sdk ( 18 or later, on the server side). : install openai-codex (Python 3.10 or later).
- A thread is one conversation. Call thread.run() again on the same thread to continue the work.
- App Server is the interface Codex uses to power rich such as the . Use it when your product needs sign-in, conversation history, approvals and streamed agent events.
- For and , codex exec or the SDK is usually enough. The app-server command is experimental and not supported for production workloads, so check the documentation before you depend on it.
import { Codex } from "@openai/codex-sdk";

const codex = new Codex();
const thread = codex.startThread();
const result = await thread.run("Find the failing test and explain why it fails");

console.log(result.finalResponse);
Running a team setup — together on the same settings
- Shared (): AGENTS.md, .codex/config.toml, .codex/hooks.json, .codex/agents/, .agents/skills/
- Personal (do not commit): ~/.codex/config.toml, files, ~/.codex/AGENTS.md
- Keep AGENTS.md short. Add a rule only when the same mistake repeats, and delete wrong rules.
- Enforce what must be followed with the sandbox and approvals, not with instructions. add a useful guardrail, but they are not a complete enforcement boundary.
- Pass CI keys only to the step that runs Codex, and run reviews read-only.
Master practice — automation and working with other AIs
- Run Codex once without a conversation: codex exec "Find the test command of this project" > report.md, then read report.md.
- Save your usual settings (, sandbox) in ~/.codex/config.toml, open codex again and check with /status that they apply.
- Make a second folder with add ../my-project-b -b try-b and give Codex and Claude Code different jobs. When both finish, have each review the other's diff.
- Leave @codex review on a GitHub pull request and see the review arrive (connect Codex to the repository first).
- Add one team rule to AGENTS.md, give the same job to Codex and Claude Code, and compare whether both follow the rule.
If you get stuck: codex exec is read-only by default, so add --sandbox workspace-write when it must edit files. If a setting does not apply, check the current values with /status and codex --help. Done all five? Check yourself with the checklist below.
Master checklist
- Shared rules in AGENTS.md — other AIs such as Claude Code work from the same instructions
- You choose the sandbox and approvals to fit the job, with defaults written in and profiles
- Repeated jobs go to skills and outside tools through . Must-follow rules go to the sandbox and approvals, with hooks as a guardrail
- Repeated work is with codex exec and the GitHub Action
- Big jobs are split across subagents and codex cloud, and only chosen results are applied
- AIs review each other's work, and a person checks the final diff and tests
The tools change often. If a command does not work, check codex --help and the official docs first. Options in older articles (--full-auto, [profiles.x]) may already have changed.
Official documentation
Checked against the official documentation on 2026-11-02. These tools change often — if a command fails, see the official docs.